M.A. Hochberg’s Technology for Teaching

Making technology easier for people

Wednesday
07/29/2015

11:31 am

Super Summer 2015

After missing last year, I taught Super Summer for the UO again this year. The classes were the same as the previous years (Stop Motion Animation and Programming in Scratch). You can see some of what we did on their Facebook page. https://www.facebook.com/uoyetag

The changes in Scratch were interesting. Not only were we using Scratch 2.0 instead of 1.4, over half of the students were already using the web based version and had accounts

One interesting thing happened. The Scratch server at https://scratch.mit.edu/ was down during some class times. Students who were using the site were very frustrated. Since there was a local version of Scratch 2.0 on their computers, I suggested that they use that, save their work locally, and then upload it when the server became available again.

Wednesday
06/10/2009

8:50 am

A Different Kind of Certificate

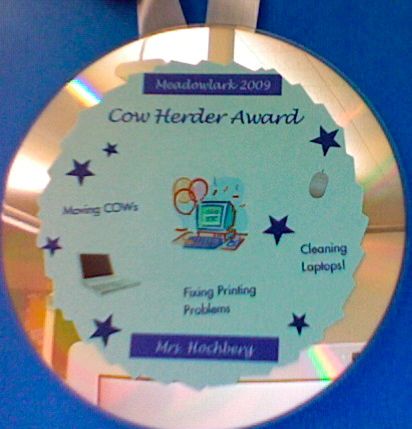
Our schools have “Cow Herders,” students who give up one recess a week to learn about the COWs, laptops, printers, and other technology. There are two teams of Cow Herders, one from each school. Their primary responsibility is to take care of the COWs, moving them, cleaning them, and trouble shooting connection and printing problems. They are a great group of kids and I wanted them to have something a little more than an ordinary award certificate. Here’s what they got instead:

Cow Herder Award Cd

The student’s certificates have their name printed above the picture of a computer. I used the CD label portion of The Print Shop 2 program to create the labels. 8D It has a merge feature too!

Tuesday
05/26/2009

5:07 pm

Nothing is as easy as it seems or why things don’t print at the end of the year

As we get close to the end of the school year, things are getting busier than ever, especially on the technology front. One challenge is that as teachers & students become more aware of the possibilities, the more they push the limits of their knowledge. While this is a very good thing, it can lead to lots of stress, frustration and tears as they struggle to complete projects before the end of the year.

Today saw a typical end-of-the year project: write an essay, put a photo they had taken at the top of the page, and print it. Sounds simple, right?

Wrong. Two classes were very frustrated by the same two problems. Most of their papers would not print. The few that did print had a black box covering much of the photo.

It didn’t take long to figure out what the problems were. The first one was the file size. The completed MS Word document was over 10 MB. While this might not be big for a college student, it was gigantic for a third grade student. When the entire class tries to wirelessly print files that big, the network and the printers tend to choke.

The culprit, of course, was the photo. Even though they had cropped the photo to fit comfortably on the page, the original dimensions were 27″ x 36″with a file size to match.

Once we deleted the photo, we went back to iPhoto and exported the photo to the desktop as a medium size jpg.  We added the photo back to the essay, saved the file, and checked the file size. Instead of being 10.3 MB, it was now 36.1 KB, vastly smaller than the original size.

Now that the file was smaller, it was much easier to move around the computer too. Using a 10+ MB file on a 512Mb/G4 laptop involved a lot waiting.

The second problem, the black rectangle covering part of the photo, an even simpler fix: change the photo layout from “behind text” to “tight.” While I couldn’t tell exactly what was covering the photo, there are enough “invisibles” that it could easily have been any number of things.   Clicking on “center” when we changed the layout also made it easier.

Some of these problems will disappear as we implement grade-level technology skills. New ones will appear. Those two classes will be finished with their projects tomorrow. I wonder what the rest of the classes will bring me.

Friday
05/15/2009

9:07 am

School-friendly Public Domain Clip Art

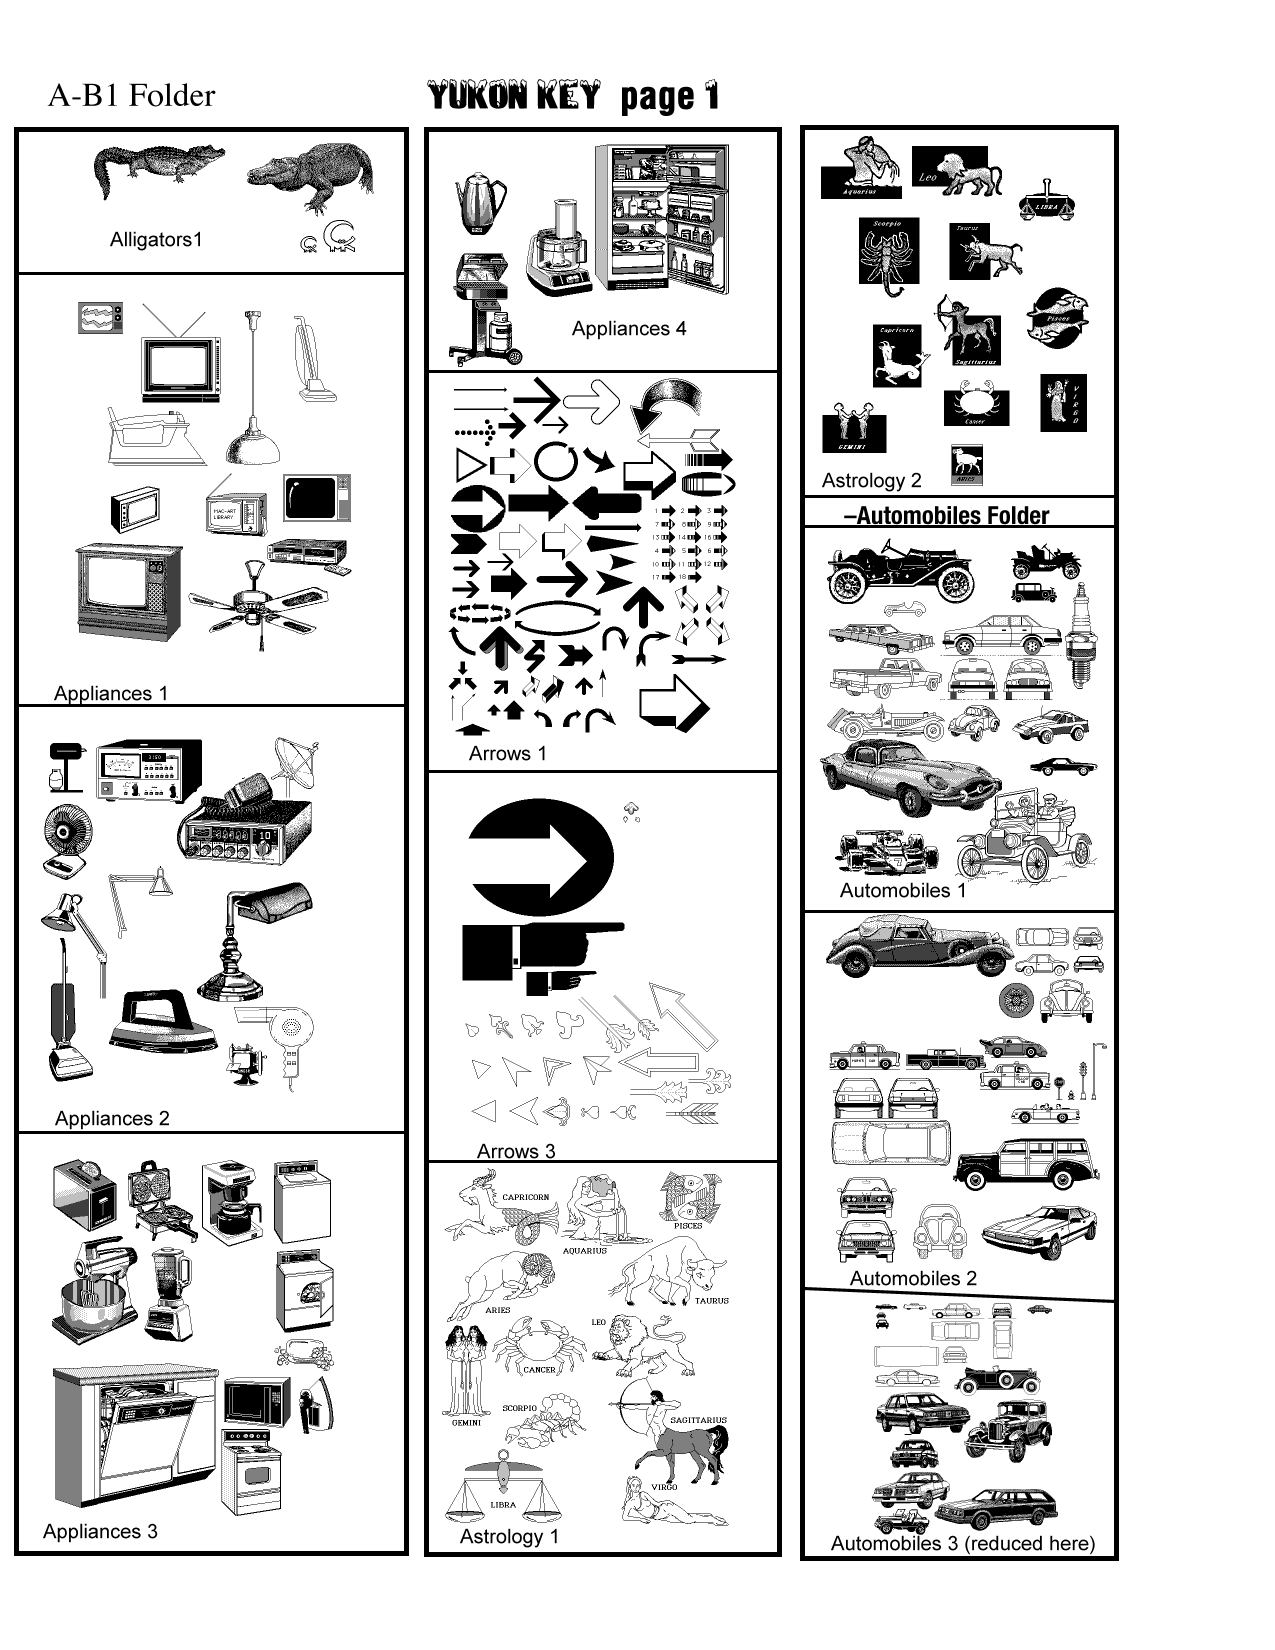
Next year, we will begin using Pages as our primary word processor for students. While it has a lot of fun and useful features, one thing that it lacks is clip art. You can search the web for clip art but here is a school friendly collection of clean, clear, and very printable line art.

Back in the early 1990’s, a collection of public domain clip art was created at Benson Polytechnic High School. For the next two weeks, the collection, called Yukon, is available for download at

http://beta.pleasanthill.k12.or.us/staff.php

Scroll to the bottom of the page and download the two zip files. One contains the image files and the other contains a catalog of all the images.

This isn’t as easy to use as a built-in collection of clip art but it does save a lot of student time. When used, students will need to be mask (crop) the clip art as there are several images in each file. On the plus side, these are all line art or half tones and they will print very well on a black & white laser printer.

I will be adding these files to media folder on our student’s computers.

Thanks to Jonathan Gilbert and his fellow high school students for creating and sharing this resource.
Thanks to Richard Adams of Pleasant Hill School District for updating the files and making them available. Yukon Key Page 1

Wednesday
05/06/2009

3:37 pm

Saving paper when using Accelerated Reader

Accelerated Reader has a default option to print the results of every quiz a student takes. This can use up a lot of paper, especially if the reports print to far away printer and are never picked up.

While the results of the quiz show up immediately, here’s a way to go back and see the results of all the quizzes a student has taken.

How to see your progress in Accelerated Reader

Friday
05/01/2009

10:53 am

What is inside the disk drive of your student computers?

Things found in a disk drive

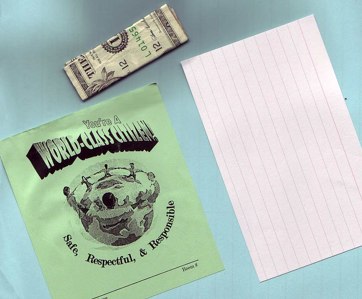
So far this year, I have removed an index card, two dollar bills, and a green World Class Citizen ticket from the disk drives of student computer. I wonder how many drives have things in them that I don’t even know about!

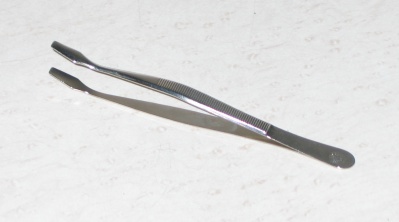
I was able to retrieve two of the items with stamp tongs, long tweezers with flat spatula tips, similar to the ones below. Mine are thinner and fit better into the drive.

Stamp Tongs

R Lerdsuwa, . “Stamp tongs.” photograph. Stamp Tongs – Wiki Media.1 June 2009 <http://commons.wikimedia.org/wiki/File:Stamp_tongs.jpg>.

Thursday
04/23/2009

7:17 pm

More on File Names and Why to Add File Extensions

I’ve written about file names earlier (see below) but it has become more important to name a file simply and completely. Recently, two new reasons have popped up, one trivial, the other much more important, to include the file extension in the name.

The file extension are the characters after the period in a file name. For example,

MyBookReport.doc

or

MyCountryReport.pages

The extension helps identify which program will open the file.

Windows computers automatically add the file extension to any file name. Depending on the settings, Mac computers may or may not add the file name and may or may not show it.

Here’s the trivial problem. If a file does not have a file extension added, Mac OS 10.5 (Leopard) does not display the icon or ‘quick view’ correctly. The file is identified correctly and it will open in the correct program.

Here’s the bigger problem—and it will become bigger next year as more staff and students begin using the files1 server to store their files. When a file is created without a file extension on a Mac and put on the files1 server, then reopened on the Mac, it loses the correct application.

For example, if a MS Word file is saved without a file extension on a Mac, copied to a files1 server, then the copy on the files1 server is reopened, it will reopen in Text Edit. Fortunately, if you add the correct extension, it opens without any problems

Since students save all their work on the server, they will see this more often. We can save a lot of bewilderment and frustration with a little preparation.

Start by setting Finder to show file extensions (Go to Finder, Preferences, Advanced, Show All File Extensions).

Next check the “file save” options for all your applications. The box labeled “Append File Extensions” should be checked.

Finally, teach students and staff what file extensions mean.

One final tip—only include one period in a file name. To see more about naming files, go to

http://blogs.4j.lane.edu/hochberg_m/2008/02/21/use-numbers-and-letters-only-when-naming-a-file-folder-drive-or-computer/
Monday
04/13/2009

10:24 am

Cow Herders find a ‘powerful’ problem

Two weeks ago, I taught the Cow herder groups about wires and cables. We took apart an Ethernet cable and they learned how electricity moves through the cable & how the different layers of the cable protect the metal inside.

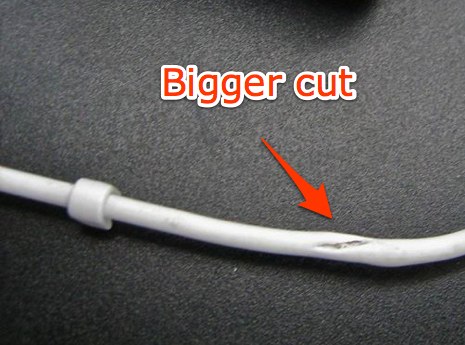
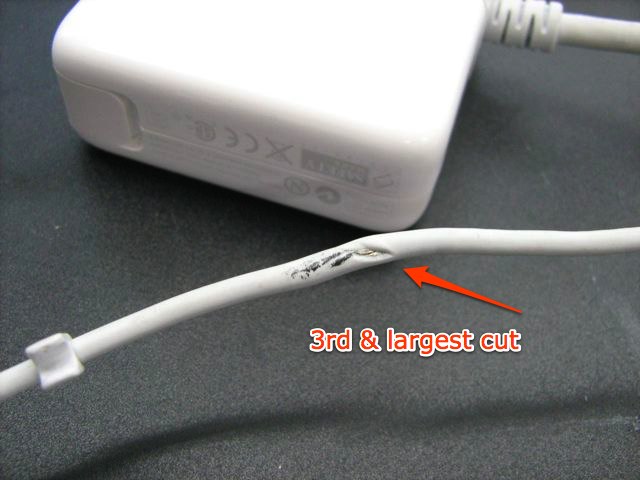
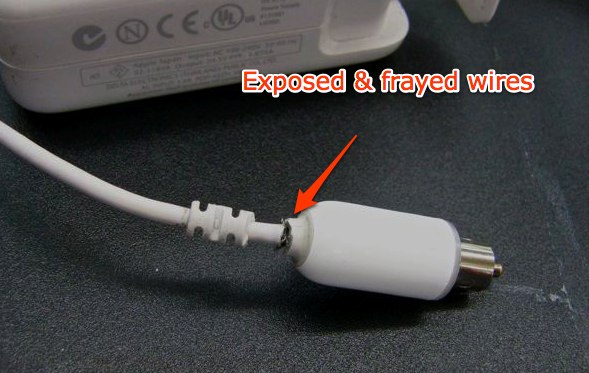
Last week, they left a laptop power cord & a note on my desk.  They were concerned because there was exposed wire in several places on the cord.

Small cut on MacBook power adapter cord

Bigger cut on MacBook adapter

Largest cut MacBook adapter

On Thursday, we looked at the damaged cord and talked about how dangerous it was. As we were putting away the laptops from our class, the Cow Herders noticed exposed wire on a different type of power cord and showed them to me.

Exposed & frayed iBook adapterOn Friday, I brought both types of power cords to the CIS technicians for evaluation. The cords are not safe to use. In particular, the MacBook adapter with multiple cuts is a severe hazard. Should the exposed wire touch the metal of the cart, it could cause a short and the entire body of the COW could be electrically charged.

The Cow herders took the knowledge they learned, applied it to the COWS around them and prevented a dangerous situation. I am proud of them.

Thursday
03/12/2009

1:17 pm

Some tips to help students remember the home row keys

Once we start touch typing, it helps to remind kids that if they can play a video game without looking at the controls, they can learn to touch type. If they can play a musical instrument, they can learn to touch type. And if they learn to touch type, it will improve their gaming, playing, and instant messsaging!

With the youngest students, it sometimes helps to write the home row letters on their hands with a washable marker.

All students benefit from practicing their typing while waiting in lines. Students wait in lines for lunch, to go to music, PE, etc. Why not practice the home row keys while they wait? It can be very inconspicuous too. With their hands at their sides, they can touch type the home row on the side of their legs!

Students can practice at home, simply by typing their vocabulary or spelling words in any word processor.

If they want a more fun or structured way to learn typing, there are several links to free online typing programs in our school’s bookmark page:

http://guest.portaportal.com/mlbv 

Under the Typing section, there are several different programs you can use.

Thursday
03/12/2009

1:08 pm

Touch Typing for Grades 1 and 2

Typically, we begin touch typing with first grade students right after Spring Break. Here’s our plans for this year.

For first grade, that means learning to touch type the home row keys with their eyes shut. We will do the typing in Kid Pix.

Their goals are:
1. To understand that they are typing by touch and not eyesight.
2. To understand that each key is only touched by the correct finger.
3. To touch-type the home row while someone calls out the letters and spaces.

For second grade, we will review the home row in Pages, then switch to All the Right Type.

Their goals are:
1. To complete lessons 1-6 in ATRT (Learning Lab, Practice Pavilion, and Skill Building) and pass tests 1a-2f in the Testing Center.
2. To touch type at 5 words per minute with 95% accuracy.

Once the students are moving all well, we will switch to a combination of typing for the first ten minutes of class, then use the rest of the time on other projects.