M.A. Hochberg’s Technology for Teaching

Making technology easier for people

Thursday
04/01/2010

4:20 pm

Laptop Battery Life

With three laptop battery failures in two days, I think it’s a good time to review some battery basics.

The most important thing is to use the battery. Some people never use it without the power cord. Whether they use the battery or not, once a month everyone should unplug the power cord and use it until it goes to sleep. If possible, let it rest for a bit. Otherwise, just plug it back in and begin using it.

Here’s something that might help.
http://blogs.4j.lane.edu/hochberg_m/2008/03/14/extend-the-life-of-your-laptop-battery/

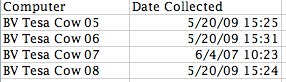
I do calibrate the batteries or laptops when I first get them. If at all possible, I do it again at the beginning of the school year. Here is a check off list that helps me to keep track of calibrating. It certainly isn’t necessary most of the time but when I have a lot going at once, it is helpful. Download Calibrate_battery

For summer storage, the batteries should be half-charged. Here’s what Apple says:
http://www.apple.com/batteries/notebooks.html

At the bottom of that page are some good tips about optimizing the battery.

For student laptops, discourage them from setting the desktop background to change. Getting the battery to last for an entire school day is hard enough without using on changing the desktop picture.

Friday
06/12/2009

3:23 pm

Apple Remote Desktop quirk

I’ve been relying on ARD to gather data for our imaging project. I learned pretty quickly to be sure to click on”Rebuild data for report” when generating the reports. If I didn’t, it would include odd or duplicate information.

Once I got the complete report, I used the information to determine Machine ID, memory needs, etc. One key field is the serial number field. That will be the computer name for Puppet and on the exterior computer label.

As I put on the new labels, I’ve been checking the serial number in the computer with the computer number on the label. Imagine my panic when I came across one that didn’t match either the label or the spreadsheet that generated the label.

After a bit of research, I discovered that my spreadsheet didn’t have the serial number anywhere. It wasn’t a case of scrambled spreadsheet or incorrectly merged labels. I wondered that if a computer could forget its serial number (see http://blogs.4j.lane.edu/hochberg_m/2009/05/26/serial-number-imac-emac/ ), could it scramble the serial number?

I reran the ARD report and this time it reported the correct serial number. I checked my original report and discovered a quirk. Even though I ran the report for a group of computers, it showed the wrong report date for the computer with the wrong serial number.

BV ARD quirk

Why or how it showed the wrong collection date for just one computer when all them were collected in the same report, I don’t know. I do know that I will be a lot less trusting and more cautious when working with ARD report data.

I did a quick check on my master spreadsheet and discovered a total of seven computers with odd collection dates.

odd-ard-dates.jpg

Time to add another thing to the to-do list!

Tuesday
06/09/2009

4:21 pm

Labeling the computers for Puppet: from ARD to Excel to Word

Here’s how I printed the labels for our computers. If you already have the serial numbers in a spreadsheet, you can skip steps 1-3.

  1. Use ARD to get a report for each computer. The report needs to include the serial number. You can include as much or little information as you would like. As this is the hardest part of the process, I get all the information as I don’t want to do it again. I can use this report for many other things so it is very worthwhile.
  2. Export the report and open it in Excel. It’s well formatted so I just click on “finish” immediately.
  3. I made a working copy of the spreadsheet and deleted any columns I didn’t need for this project.
  4. I used the spreadsheet to figure out the MID for each computer and added it as a new column.
  5. Now I added two more columns: one for the OS and one for the Base Image.
  6. Once those were done, I saved and closed the file.
  7. I opened MS Word and used the label and data merge tools to create the labels for each computer.

Here’s a sample of the label. I included the “Info 1” field as that will be our local name for the computer. This will make it much easier to be sure that I have the right label on each computer too.

Puppet labels

Tuesday
06/02/2009

4:08 pm

A rectangle is not a text box

Sometimes things look alike but have different meanings. For example, a “bat” can be a piece of sports equipment or an animal.  Whatever you do, don’t use the wrong one when you are trying to hit a ball!

The same is true with computers, especially in word processing. Look at these two rectangles.

Text box and Rectangle object box

They both look alike: solid yellow rectangles with a black border. But they are not the same. One is an “object box,” a shape that can be moved, recolored, or resized. Think of it as a building block. It’s great for design work,  but you can’t write with a building block. You can’t even click inside it.
The other rectangle is a “text box,” a solid yellow rectangle with a black board. You can move, recolor, or resize it. You can do everything with it that you can with an “object box” plus you can do one thing more: you can type inside of it.

Here’s what it looks like when you type inside a text box.

Text box with insertion point

Notice the line at the end of the sentence. That is the “insertion point,” the place where the typing will appear. When you first click inside a text box, the insertion point is in the upper left corner.
Whenever you move a text box, the writing inside it moves too. You can even change the color of box and the words stay the same.

If you type in front of an object box, it might look like the words are inside the box but when you move the box, the words don’t move.

Object Box with text in front of it

When I moved the box but the words stayed behind.

The words stayed behind

How do you know which one you are creating? A text box icon usually has a letter A or T in it. If you hover your mouse over it, it will say “text box.”

Text boxes and object boxes. Don’t mix them up. You’ll save yourself a lot of frustration.

Tuesday
05/26/2009

5:07 pm

Nothing is as easy as it seems or why things don’t print at the end of the year

As we get close to the end of the school year, things are getting busier than ever, especially on the technology front. One challenge is that as teachers & students become more aware of the possibilities, the more they push the limits of their knowledge. While this is a very good thing, it can lead to lots of stress, frustration and tears as they struggle to complete projects before the end of the year.

Today saw a typical end-of-the year project: write an essay, put a photo they had taken at the top of the page, and print it. Sounds simple, right?

Wrong. Two classes were very frustrated by the same two problems. Most of their papers would not print. The few that did print had a black box covering much of the photo.

It didn’t take long to figure out what the problems were. The first one was the file size. The completed MS Word document was over 10 MB. While this might not be big for a college student, it was gigantic for a third grade student. When the entire class tries to wirelessly print files that big, the network and the printers tend to choke.

The culprit, of course, was the photo. Even though they had cropped the photo to fit comfortably on the page, the original dimensions were 27″ x 36″with a file size to match.

Once we deleted the photo, we went back to iPhoto and exported the photo to the desktop as a medium size jpg.  We added the photo back to the essay, saved the file, and checked the file size. Instead of being 10.3 MB, it was now 36.1 KB, vastly smaller than the original size.

Now that the file was smaller, it was much easier to move around the computer too. Using a 10+ MB file on a 512Mb/G4 laptop involved a lot waiting.

The second problem, the black rectangle covering part of the photo, an even simpler fix: change the photo layout from “behind text” to “tight.” While I couldn’t tell exactly what was covering the photo, there are enough “invisibles” that it could easily have been any number of things.   Clicking on “center” when we changed the layout also made it easier.

Some of these problems will disappear as we implement grade-level technology skills. New ones will appear. Those two classes will be finished with their projects tomorrow. I wonder what the rest of the classes will bring me.

Tuesday
05/26/2009

10:16 am

Macs without Serial Numbers?

We have three Macs that have lost their serial numbers. Not on the outside, but internally. One is an eMac, the other two older G3 iMacs. Checking System Profile, running an  ARD report, or even sending Unix commands still doesn’t return a serial number.

Not having the serial number internally was not a problem until now. With the new system for managing student computers, however, the serial number becomes the computer’s name and chief identifier.

The good news is that there is a fix. Our helpful hardware techs, Brad & Bob, have a program that will reinstall the serial numbers on the logic board. The only downside is that you have to bring the equipment to them.

Friday
05/15/2009

9:07 am

School-friendly Public Domain Clip Art

Next year, we will begin using Pages as our primary word processor for students. While it has a lot of fun and useful features, one thing that it lacks is clip art. You can search the web for clip art but here is a school friendly collection of clean, clear, and very printable line art.

Back in the early 1990’s, a collection of public domain clip art was created at Benson Polytechnic High School. For the next two weeks, the collection, called Yukon, is available for download at

http://beta.pleasanthill.k12.or.us/staff.php

Scroll to the bottom of the page and download the two zip files. One contains the image files and the other contains a catalog of all the images.

This isn’t as easy to use as a built-in collection of clip art but it does save a lot of student time. When used, students will need to be mask (crop) the clip art as there are several images in each file. On the plus side, these are all line art or half tones and they will print very well on a black & white laser printer.

I will be adding these files to media folder on our student’s computers.

Thanks to Jonathan Gilbert and his fellow high school students for creating and sharing this resource.
Thanks to Richard Adams of Pleasant Hill School District for updating the files and making them available. Yukon Key Page 1

Wednesday
05/13/2009

10:27 am

A Number is not a Name – How to Name a Computer for People to Use

The upcoming changes to the way we manage and image our student computers offers a lot of challenges and changes.  One change that is great for identifying computers but not so good for day-to-day use is having the computer’s name be the computer’s serial number.

Just as we humans have numbers, legal names, & preferred names, so can our computers.

Here’s what we will be doing at Meadowlark & Buena Vista Schools.

The computer’s “legal” name will, of course, be the serial number. That is what will show up on the log in window and in ARD as the “Computer Name.”

Our computers are already labeled with a name that identifies which one and where it is. For example, classroom computers are labeled & named
Room 9_1
Room 9_2

and laptops named
ML Blue Cow 10
ML Blue Cow 11

This tells me where the computer is and which one it is. Since the slots on the COWs are also labeled, it tells students where to return the laptop. This helps them identify which is their usual computer.  “I use #12 on the Blue COW & #24 on the Red COW.”

(It would be nice if they had the same number on each COW but not all our COWs have a class set of laptops.)

With the upcoming change to the serial number for computer name, how can I quickly identify a computer with ARD 3?

Here’s the solution we will be using.

In System Preferences/Sharing/Remote Management/Computer Settings are four fields. We have been using three of them. Now we will use another field for our computer’s “preferred name.” Here’s an example.

Comuter Info Fields for Computer Preferred Name

We currently use Info 2 for the Eugene School District inventory tag number. Info 3 shows which school owns the computer (our lab & library computers are shared by both schools but owned separately.) Info 4 shows whether it is a staff or student computer.

This does require minor editing after a computer is imaged but our past images already included info 3 & 4 and part of  2. Future images would have “ML Blue Cow ” in Info 1 so all I would have to add is the ending number.

How will this help in ARD? The main ARD window allows you to add all four fields to the selected columns. (Control/click at the top of any column) You can even rearrange the columns to suit you. I put Info 1 field next to the “Computer Name” column.

Now when a student calls to tell you that computer #3 in room 18 needs help, you can spot it quickly in ARD.

Friday
05/01/2009

10:53 am

What is inside the disk drive of your student computers?

Things found in a disk drive

So far this year, I have removed an index card, two dollar bills, and a green World Class Citizen ticket from the disk drives of student computer. I wonder how many drives have things in them that I don’t even know about!

I was able to retrieve two of the items with stamp tongs, long tweezers with flat spatula tips, similar to the ones below. Mine are thinner and fit better into the drive.

Stamp Tongs

R Lerdsuwa, . “Stamp tongs.” photograph. Stamp Tongs – Wiki Media.1 June 2009 <http://commons.wikimedia.org/wiki/File:Stamp_tongs.jpg>.

Thursday
04/30/2009

10:20 am

MS Word Clip Art and Firefox

If Firefox is your default web browser, you may have a problem with clip art that you download from the MS Office free online clip art. http://office.microsoft.com/en-us/clipart/default.aspx

The clip art downloads and looks like this:

Clip Art icon

When you click on it, it may try to open in Text Edit or fail to install in the Clip Art Gallery. Fortunately, there is a very simple fix. Add the extension to the file name. Change “ClipArt” to “ClipArt.cil”

Immediately, the icon changes.

Clip Art icon with extension

Now when you double click on it,  it installs into your Office Clip Art gallery.

This problem doesn’t occur when you use Safari to download the Clip Art.