On This Page
______________________________________
Reading Support
Text-to-Speech
Text-to-speech (TTS) is commonly used to read text on the screen aloud by a computer or other device. It can be helpful or even critical for a variety of students. It supports those with visual impairments, learning disabilities, attention issues, or motor challenges. It can also build reading skills and improve comprehension of the material when students visually read and listen to text at the same time. TTS is an important tool for our students whose primary language is not English. (see ELL supports page on this site) There are many voices to choose from and speed settings can be individualized. There are many language options as well.
1. Mac –Speak Selection
 Control + R
The built-in Mac feature –Speak Selection– will work in most applications where text can be selected/highlighted with the cursor. Simply highlight the text then use the keystroke combination Control + R.
Students and staff using newer MacBooks should have the Speak Selection feature already set up by the district. If you would like to change the voice or speaking rate, or if you are using an older MacBook that needs to have this feature activated, use the resources below for support. Students using shared MacBooks may not be able to keep their customized voice settings in place if other students change it.
- Newer student and staff MacBooks -MacOS Ventura and Sonoma
- Older student and staff MacBooks
2. Google Read&Write Text-to-Speech Options

The Google Read&Write (R&W) extension will read most text accessed through the Google Chrome Browser.
- How to Access Google Read&Write
- How to use Google Read&Write text-to-speech features
_______________________________________
Writing Support
Speech-to-Text

Speech-to-text can help students express their knowledge and ideas in written format by using their voice to type instead of the keyboard. For some, it is the way they write all the time. For others, it can be a great 1st step in the writing process or can be a useful tool for typing words that are difficult to spell.
Using speech-to-text effectively may take practice. Here are a few tips when using speech-to-text:
- Rehearse a given thought/idea using slow & clear speech for practice.
- After activating the microphone, wait 1 second before
speaking. (this ensures the first word is not cut off) - Dictate punctuation/endmarks
- Start/stop the microphone between thoughts/ideas, unless capable of
clearly speaking multiple sentences with endmarks and without long
pauses or excessive background noises. - Look away from the screen while dictating to reduce distractions and
increase focus on the intended speech.
Headset w/noise cancelling microphone: 
Using headphones with a microphone can help to filter out background noise during dictation. Talk to your principal about ordering some for your classroom. The district has approved these headsets : LINK
1. Mac –Dictation

This built-in Mac feature will allow speech-to-text writing accessibility anywhere writing occurs ***Except for Google Docs when using Google Chrome***
Simply place the cursor into an editable textfield or word processing application and then use the keystroke F5. It works great in Canvas text entry fields, Pages, Notes, Preview, etc. For speech-to-text accessibility with Google Docs, use Google Read&Write Talk&Type , Google Docs Voice Typing, or use the Safari/Firefox browsers with Google Docs for compatibility with the F5 dictation key.
Students and staff using newer MacBooks should have the Mac Dictation speech-to-text feature already set up by the district. If you are using an older MacBook that needs to have this feature activated or you are unsure of the keystroke needed, use the resources below for support.
- Newer student and staff MacBooks -MacOS Ventura and Sonoma
- Older student and staff MacBooks
2. Google Read&Write –Talk&Type
The Google Read&Write (R&W) extension provides a flexible speech-to-text feature known as “Talk&Type“. It permits speech-to-text in most editable writing fields accessed from the Google Chrome Browser. It is a great choice for Google Docs, Canvas text entry fields, Google Slides, etc.
- How to Access Google Read&Write
- How to use Google Read&Write “Talk&Type“
- PDF Instructions –link
____________________________________
Word Prediction
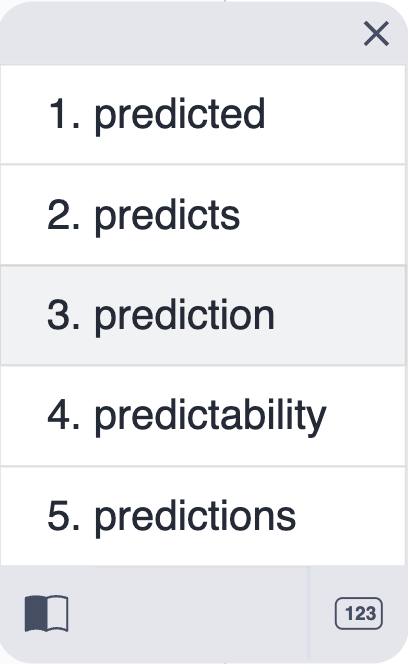
Word prediction can support students with spelling, reading, and motor challenges. It predicts word choices and completes word spelling based on phonetics and context. It can help build spelling skills and increase the use of vocabulary. Students with motor challenges and learning disabilities can type out more words with fewer keystrokes.
1. Google Read&Write –Prediction

![]()
- Part of suite of Universal Design for Learning (UDL) tools with visual toolbar
- Optional visual/picture-based word bank
- Topic dictionaries available for some writing subjects/interests
- How to Access Google Read&Write
- How to use Google Read&Write “Prediction“
- PDF Instructions –link
2. Co:Writer (separate Chrome extension)

- Writing Accessibility focus only
- Speech-to-text tool alongside word prediction tool
- Topic dictionaries available for any subject or interest
- Multi-language writing support
- How to Access Co:Writer
- How to use Co:Writer
____________________________________
PDF Support
PDF Accessibility
PDFs can create additional complexity for students who use assistive technology. PDF formats should be digitized/accessible prior to assigning to students. For example, PDFs created from screenshots and scanned paper documents without using OCR (optical character recognition) are not accessible digitized formats. Please refer to our “Creating Accessible Educational Materials” tab (top of page) for instructional resources on how to do that.
In Canvas, PDFs can be assigned in so many different ways, all with varying steps for students to use their accessible/assistive technology. For read-only access using text-to-speech tools there are fewer steps for students, but with nuanced differences in workflow depending upon how PDFs are assigned. Many students may want to highlight and annotate/take notes with PDF content. Below you will find more information on how to leverage greater PDF accessibility for students so they can fully participate with these materials.
1. Using text-to-speech with read-only PDFs
If the Google Read&Write and/or built-in Mac Speak Selection tools do not provide read aloud support with a particular PDF, refer to the steps below.
2. Fully accessible PDFs with optional annotation
If an assigned digitized PDF does not allow for text-to-speech “read aloud” accessibility and/or if a student would like to be able to annotate the PDF (take notes, fill out responses to questions, highlight, etc.) there are 2 good options:
1. Canvas “Student Annotation”

The recommended method of assigning PDFs to students is to use the Canvas “Student Annotation” submission option. This will give students full reading and writing accessibility with PDFs and the simplest workflow to participate and submit PDFs for credit. Both Google Read&Write and built-in Mac Accessibility features work well with this option.
How teachers assign PDFs in Canvas with the Student Annotation submission option
How students access Canvas PDFs assigned with “Student Annotation”
-
- PDF Instructions –link
2. OrbitNote

OrbitNote is a Google Chrome extension and Google Drive app that provides great reading and writing accessibility with PDF formats. If a teacher has not provided the Canvas “Student Annotation” submission option, then OrbitNote is the next best solution.
Other Accessibility Features
Chrome Extensions Webpage
There are several additional Chrome extensions that can be added to synced 4J student Chrome profiles. Navigate to our Chrome Extensions webpage to learn more –link