A new beautiful photo from space every day

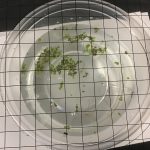
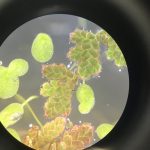
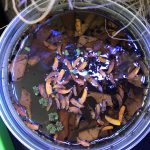
Over the next month, our class will be investigating Lemna (duckweed) and Azolla (an aquatic fern) to see which one will produce more biomass. Scientists are investigating these two plants as possible food sources for livestock and humans and/or as a non polluting biofuel. We are wondering which will produce more biomass over a month of growing in our classroom. We have set up pond like environments and are asking questions about biomass and also which plant is more likely to become invasive. Some students are investigating whether the plant grows better in plain water or a pond environment. Stay Tuned…
Photo creds to Casey for middle photo taken through the microscope with his iPad

Here are the results from lesson 4. Use these to write your CER on page 62
This video was actually taken last year when the oxygen probes were working. So we will use it as our data source for this year. If you were absent this day, please see me to get the accurate numbers for the CO2 monitor, but you should be able to get the Oxygen data from the video.
Dear 8th grade science students,
I am looking forward to the coming weeks and months when we will get to know each other and begin to learn and grow together. 8th grade year is a really significant one in my experience because you are on the threshold of High School. 8th grade is a time to develop and hone your “student skills” including time management, organization, critical thinking, reading and writing. Next year as a ninth grader you will also work on these skills but the stakes will be higher. The transcript (grade report) that colleges and potential employers look at starts in the fall of the ninth grade year… so I see 8th grade as the perfect opportunity to dig in and start to see yourself as a scholar on your way to a career of your dreams. My job as your 8th grade teacher is to challenge you, give you feedback and support you as needed and I am prepared to do all three. I encourage you to develop relationships with all your teachers and one of the best ways to do that is to come to office hours to work with your teachers one on one or in small groups. There is an office hours tab at the top to see when I am available to meet with you. Let’s have a great start! Feel free to contact me at any time via email at hohenemser@4j.lane.edu
Ms Julie Hohenemser
June 12, 2018:
Today in class I am asking you to write a letter to your 18 year old self at the end of your senior year in high school. You don’t need to use all the prompts below, but try to write about as many of them as you can during this class period. Since I won’t know how to contact you as a senior.. I am asking you to name it “letter to my senior self” and save it to your google docs. Here are some ideas to get you started writing.
What is most important to you now?
How are you feeling about the end of middle school and the start of high school
Who are your best friends? Who do you think you will still be friends with in 4 years?
How do you spend your time on electronic devices (phone, iPad, computer) social media (twitter/snapchat/instagram etc), apps, games,
How much time do you spend on your device a day? Do you predict this will change during high school? in which direction
What non-screen activity do you like to do in your free time?
What’s your favorite extra-curricular activity now ? (sports/dance/art/music/drama/other) What types of clubs do you think you will have joined by the time you are a senior?
Who is a person you really admire now ?(sports/actor/politician/author etc)
Do you think you will be in a leadership role in one of your high school activities? Which activity?
Do you have a favorite subject in school…now?.. how do you predict that it might change over the next four years?
What career do you think you are most interested in now?
What college (s) do you think you will apply to? If you don’t think you will go to college, what will you do after graduation from high school?
What type of music do you listen to now? Favorite bands/singers etc.
What is your relationship like with your family members now (parents/guardians and siblings)? How do you think these relationships will change over the next four years?
How tall are you now? How much do you weigh…DO you hope to grow or stay the same size?
If you could travel anywhere in the world where would you like to go?
Who do you think will be president when you are a senior?
What personal goals do you have by the time you graduate from high school? (fitness/social/academic/leadership etc)
What advice do you have for your 18 year-old self?
Who will you rely on to help you make good choices during high school? Who might encourage you to make not so good choices?
Review Materials for Oregon State Test–Retake of the Science Oaks Test is available for students who didn’t meet. We will be pulling students from 5th and 6th period Tuesday, June 5. If you met and want to try to exceed you need a note from a parent/guardian indicating that it is okay for you to test.
Life Science Questions and Links to Resources also as an empty PDF
Earth Science Review Questions use the Earth Science Slide Show to fill out
There are links to facts sheets in the post below this one. Check those out on Tuesday, May 15
The 21st annual Solar Car Challenge is happening at Cal Young Middle School on June 9th from 9:30-1:30 ish. Our science classes will be sending the two fastest cars from each class to compete in this annual race.
Beginning Wednesday, May 16
After you are satisfied with your Roll Down Score, it’s time to get it is time to get your motor, wiring, mount and battery pack attached. . Make sure you have recorded your scores on the spreadsheet on your teacher’s computer,
12. But first you must complete the top view of your design. Decide where the motor will go, finalize which gears you will use and draw in your solar panel mounts and battery pack. Get your drawing approved by your teacher before going to step 13.
13. Bring your Green materials sheet to the front counter with the items listed above filled out. You can choose from a prewired motor or do your own wiring. You will attach your motor with hot glue and your battery pack with velcro (please do not glue it). If you plan to use a motor mount you can also ask for some tiny screws to attach the motor to the mount or just glue it directly to the chassis. Be careful not to get glue in the teeth of your gears.
14. The important thing about mounting your motor is to get the gear spacing perfect. Gears that are too tight will reduce the rotational force that comes from your motor and slow down your car, but gears that barely touch each other will also not move your car very fast. You have to find that perfect sweet spot where they make good contact but don’t exert too great a force on each other.
15. Once you have mounted your motor with a pinion/driver gear, attached your battery pack with velcro and inserted your used batteries, it is time to take your car “out for a spin”. ALWAYS MAKE SURE THERE IS SOMEONE AT THE OTHER END OF THE TRACK THAT YOU TRUST. YOU DO NOT WANT TO HAVE TO START OVER! Get a green speed sheet for your group from the file folder on the front counter. Your initial speed test will be completed on the track in the back off the classroom on the roofing paper. This track is marked at 8 meters in length. In order to calculate your speed you will divide 8m by your car’s time in seconds.Use your iPad or phone for timing. For example 8 meters in 4 seconds would be 8/4= 2 m/s. A fast speed on this track is about 3 m/s. Record your speed on the bulletin board chart as well as on the computer spreadsheet.
16. Once you are happy with your time trials on the 8 meter track, you are ready to set up the hallway track and get a 20 meter speed (this should be faster than your 8 meter speed because your car will likely not reach a terminal velocity on the 8 meter track). You may need to add some traction to your drive wheels (the ones that are connected to the motor) You can use rubber bands or part of an inner tube from a bike tire. You may also decide that you want to make some kind of bumper for your car if it always pulls to one side. Possible materials are aluminum axel material or zip ties or anything else you can think of.
17. Once you are happy with your hallway speed without a solar panel, record your top speed on the bulletin board data table and the computer spread sheet as well as on your green speed sheet. It is now time to attach your solar panel. A good time for the 20 meter track without a solar panel is 5- 6 seconds. So the speed would be 20 m/ 6 sec = 3.3 m/s 20m/5 seconds= 4 m/s.
18. Now it is time to attach your solar panel mounts. Use the scraps that you made cutting out your chassis or any of the balsa scraps from the scrap box near the table by the whiteboard. The solar panel mounts should be glued down, but your solar panel MUST BE ATTACHED WITH VELCRO. Your teacher may give you a broken solar panel to test unless there is an outdoor track set up. This is to avoid breaking working solar panels in crashes.
19. For you last required speed test, you must run your car in the hall with batteries and the solar panel. Record your speed in m/s on the bulletin board data table and computer spreadsheet. This speed will be slower than without the panel. Finish your green speed sheet and turn it into the basket. If we have time, we will set up an outdoor track.
Here are some resources you can use as you design, build and test your solar car.
Getting Started: (Thank you to Dustin Dawson who put together these sheets). Please open in notability and answer the questions with your group as assigned in class.
NEW! Axles, Bearings and Wheels 5.15
After the Roll Down Test
Once you have attached the motor and are testing in the hall
Motor, Batteries and Solar Panel
Before you start, please turn in your SN to the tub. Also if you didn’t turn in your yellow packet (completed) yesterday, turn that in now as well.
Assignment for Friday May 11th
Simple Machines:
We are transitioning from PS3 How will it Move to Electric and Solar cars starting Monday. A topic that is not covered in our physics unit is simple machines. There are six types of simple machines. You will research the main three: Inclined Planes, Levers and Pulleys using the resources below. You will make a mind map/concept map on a large sheet of paper illustrating what you learn. The words Simple Machines should be in the center of your mind map/concept map. Your final product should have images with some examples of each simple machine, as well as key information as to how it works and what makes it a simple machine, how does it make work easier? If you have extra time, you can research the other three types of simple machines (screw, wheel and axel, wedge) and add them to your mind map. Make it colorful and artistic with images and words describing your findings.
By the end of the research and mind map creation, you should be able to write a few sentence summary of what makes something a simple machine. Add this sentence to the bottom of you mind map. Don’t forget your name and period before you fold it in half and turn it into the basket.
If you have extra time check out these Rube Goldberg devices using simple machines. Rube Goldberg was a cartoonist who designed impossibly complex devices in his cartoons to do ridiculously simple things.
Rube Goldberg with 6 simple machines
If you want more: Here is a Bill Nye on Simple Machines